These are the notes from a presentation made to the Bruce Grey Linux Users Group in June 2005.
DVD is an acronym of Digital Versatile Disc. The word versatile is important: DVD comes in many different forms appropriate for different types of media; e.g. DVD ROM, DVD Audio, DVD Video. For more information about DVD formats, see reference #1. This presentation focuses on DVD Video.
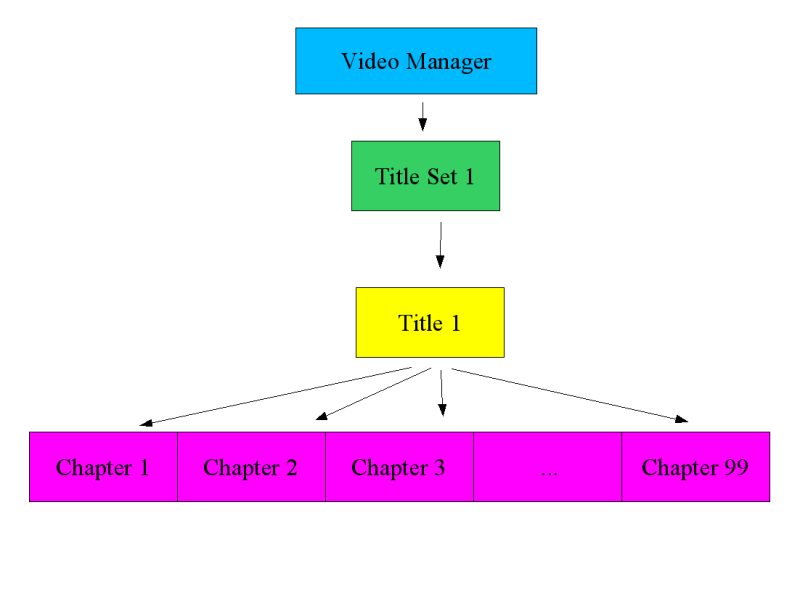
A DVD Video disc contains one video manager menu (vmgm). The video manager menu may also be called the top menu or disc menu. Your DVD remote control should have a top menu or disc menu button. Later I will describe exactly what a menu may contain. When the disc starts it will usually start with the video manager menu. If no video manager menu is defined, then the DVD player will (usually?) move to the first title set menu.
The DVD must contain at least one title set (title set 1). I couldn't find a specification of a maximum number of title sets, but in practice we only need one title set.
Every title set may have one or more menu. You don't need to have a menu. If no menu is found, then the DVD player should go directly to title 1. So if you have a single video file, MYMOVIE.MPG, that you want to burn to DVD, you can define it as title 1, burn it to DVD with no menus, and when you press play you will see MYMOVIE.MPG.
In practice, most DVDs have multiple titles and therefore the title set must have a menu. When you press the menu button on your remote control, you see the titleset menu. Sub-menus may be defined. Submenus are often used for “scene selection”. Some DVDs might include language menus or angle menus. These menus are also implemented at the titleset level.
A title does not have a menu. A title consists of one or more program chains (pgc). You might think of a program chain as a mpeg stream with additional features built in. A title may be subdivided into chapters. In reality, the title isn't really subdivided – the chapter markers are more like bookmarks at certain locations in the program chain. In common usage, these chapters are usually referred to as scenes. There must be at least one chapter marker – it marks the beginning of the video in the pgc and is known as chapter 1. The maximum number of chapters in a single title is 99. The next and prev buttons on the remote control move the video to the next and previous chapters in that title.
For more information about DVD structure and functions, see reference #2.
So suppose you have an mpeg video file on your PC and you want to change this video file to a DVD format. How to you do it? First you need to specify the functional structure of the target DVD – that is to say, you need to specify the vmg and its menu, the video title sets and their menus, the titles and chapters. Then you need a tool which takes this definition and the data files and transforms them into a DVD Video file structure. In linux, the tool is called dvdauthor. And the structure is specified using a dvdauthor.xml file.
The best way to learn the dvdauthor.xml code is to look at some examples. Here is an example of the simplest dvdauthor.xml file:
<dvdauthor>
 <vmgm>
 </vmgm>
 <titleset
   <titles>
     <pgc>
       <vob file="video.mpg" />
     </pgc>
   </titles>
 </titleset>
</dvdauthor>
As you can see, the vmgm is empty. There is one titleset containing one title. The title consists of one program chain. If you create a DVD using this structure it will work, but there will be no menus, no chapters (actually dvdauthor automatically creates a chapter at the beginning of the video stream), and you will need to burn a separate DVD for each of your mpg files. Suppose you wanted to put several mpeg files on one DVD:
<dvdauthor>
 <vmgm />
 <titleset>
   <titles>
     <pgc>
       <vob file="video1.mpg" />
       <vob file="video2.mpg" />
       <vob file=”video3.mpg” />
       ...
       <vob file=”videoN.mpg” />
     </pgc>
   </titles>
 </titleset>
</dvdauthor>
This dvdauthor.xml file puts N mpeg files onto a single DVD. dvdauthor automatically adds a chapter marker at the beginning of each file, so you can use the next and prev buttons to skip from one video to the next.
Suppose you are watching a title and it reaches the end. You can add the pause attribute to either a pgc tag or a vob tag to add a pause at the end of the pgc or vob:
<dvdauthor>
 <vmgm />
 <titleset>
   <titles>
     <pgc pause="inf">
       <vob file="video1.mpg" pause="5"/>
       <vob file="video2.mpg" pause="5"/>
       <vob file=”video3.mpg” pause="5"/>
       ...
       <vob file=”videoN.mpg” pause="5"/>
     </pgc>
   </titles>
 </titleset>
</dvdauthor>
Or you can use the <post> instruction to instruct the dvd player what to do:
<dvdauthor>
 <vmgm />
 <titleset>
   <titles>
     <pgc>
       <vob file="video1.mpg" />
       <post>
         jump chapter 1;
       </post>
     </pgc>
   </titles>
 </titleset>
</dvdauthor>
These examples have been very simple but useful. The DVDs will be effective, but not very pretty. Here is an example from a more interesting DVD that I recently mastered:
<dvdauthor dest="dvd">
<vmgm>
<menus>
<pgc entry="title">
<vob file="intro.mpg"/>
<post>jump titleset 1 menu;</post>
</pgc>
</menus>
</vmgm>
<titleset>
<menus>
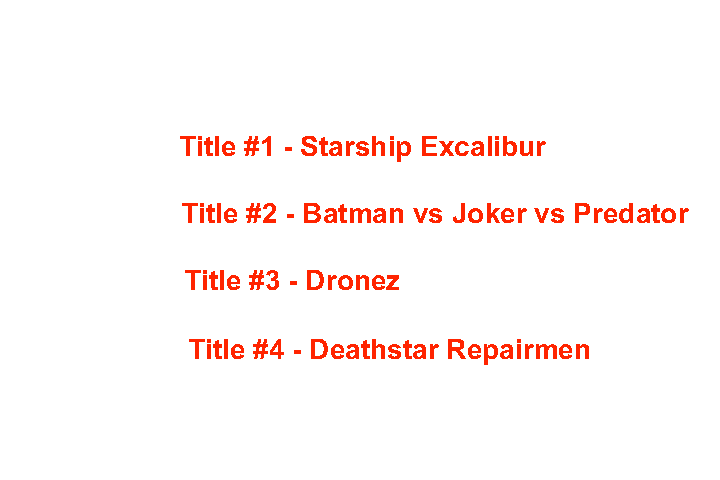
<pgc entry="root">
<button> jump title 1; </button>
<button> jump title 2; </button>
<button> jump title 3; </button>
<button> jump title 4; </button>
<vob file="menu.mpg" pause="inf"/>
</pgc>
</menus>
<titles>
<pgc>
<vob file="01.mpg" chapters="0,5:00,10:00,15:00,20:00,25:00,30:00,35:00" pause="3"/>
<post> call menu; </post>
</pgc>
<pgc>
<vob file="02.mpg" chapters="0,5:00,10:00,15:00,20:00,25:00,30:00,35:00" pause="3"/>
<post> call menu; </post>
</pgc>
<pgc>
<vob file="03.mpg" chapters="0,5:00,10:00,15:00,20:00,25:00,30:00,35:00" pause="3"/>
<post> call menu; </post>
</pgc>
<pgc>
<vob file="04.mpg" chapters="0,5:00,10:00,15:00,20:00,25:00,30:00,35:00" pause="3"/>
<post> call menu; </post>
</pgc>
</titles>
</titleset>
</dvdauthor>Other great resources:
http://www.tappin.me.uk/Linux/dvd.html
Here are the relevant rules from my makefile which I use to create the menu for one of my DVD projects. The rest of this section will explain how this works.
menu.mpg: nebula.jpg ../common/spumux.xml buttons.png highlight.png selected.png
        dd if=/dev/zero bs=4 count=1920 | toolame -b 128 -s 48 /dev/stdin silent.mp2
        jpeg2yuv -n 60 -I p -f 29.97 -j nebula.jpg | mpeg2enc -n n -f 8 -o menu_background.m2v
        mplex -f 8 -o menu_background.mpg menu_background.m2v silent.mp2
        spumux ../common/spumux.xml < menu_background.mpg > menu.mpg
A menu consists of some buttons on top of a background. First lets consider the background. In the computer world we typically think of a background image as static, but for DVD video the background is an mpeg video clip. It can be very short, for instance two seconds long, or it can be very long. The background mpg will automatically loop, giving the appearance of a continuous video. You might convert a video clip from your collection to mpeg for use as a background using techniques described in the next section. But right now I will show how to use a still image as a menu background.
In this example I will use a still image of a nebula:
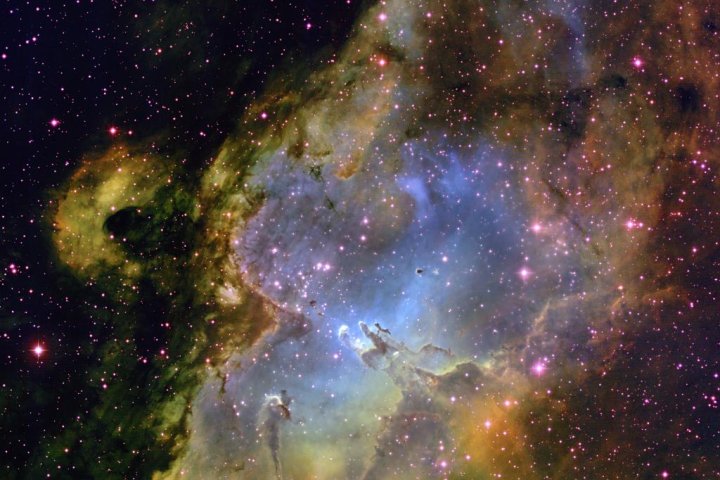
Notice that this image is a jpeg file and I have already converted it's resolution to 720x480 pixels. NTSC D1 resolution is actually 720x486, but for some reason I did all my DVDs at 720x480 and they worked. Maybe I misread the documents. Another thing to consider is that the pixels on a DVD are not square, which means that the images will look a little different on the TV. But for now we won't worry about these details. Instead we will use this command (thanks to Bertrand Petit) which takes any size image, converts it to the NTSC DVD resolution, then turns that image into a short mpeg video stream:
bash$ jpegtopnm| \ ppmtoy4m -n 60 -I p -F 30000:1001 | \ y4mscaler -O preset=3DDVD -O infer=3DEXACT | \ mpeg2enc -n n -f 8 -o menu_background.m2v
This is actually four commands, each piped to the next. The first command converts the jpeg image to pnm (piped to stdout), then the second command converts the pnm image to an uncompressed NTSC formatted yuv4mpeg2 stream of 60 frames. The third command scales the yuv4mpeg2 stream and the fourth command performs motion compression on the stream and saves the compressed stream in menu_background.m2v. So now we have an mpeg2 video clip. But it won't work as a background because menu backgrounds must have a sound channel. We can add a silent sound channel like this:
bash$ dd if=/dev/zero bs=4 count=1920 | toolame -b 128 -s 48 /dev/stdin silent.mp2
bash$ mplex -f 8 -o menu_background.mpg menu_background.m2v silent.mp2
The first line creates a mp2 audio file containing two seconds of silence. The second line multiplexes the mp2 audio file and the mpeg2 video file. Now we have a audio/video mpeg clip that we can use as a background. Now it's time for the hard part: we have to make the buttons.
There are lots of ways to implement menu buttons. Think about DVD's that you have watched at home. When you get to the main menu, there might be some words on the screen, such as “Play Movie”, “Scene Selection”, “Extras”. The words are all a certain “normal” colour, let's say they are white. You move the focus from one menu item to another using the arrow keys on the remote. When a menu item has focus, it is said to be selected and it appears in a highlight colour, let's say it appears yellow. When you activate a menu item, it momentarily appears in a different colour, let's say red, then something happens (the movie starts, the scene selection menu appears, etc).
In this case, the entire word or pair of words was the menu button. And each menu button has three states: normal, selected and activated. We create a bitmap of the screen for each of these states. Here's are some examples I made using The Gimp. Notice that most of each image is transparent, that each image uses a colourmap of only two colours, and that the only difference between the images is the colour selected in the colourmap.
This is the normal image of the buttons. Notice that most of the image is transparent – just the buttons are visible.
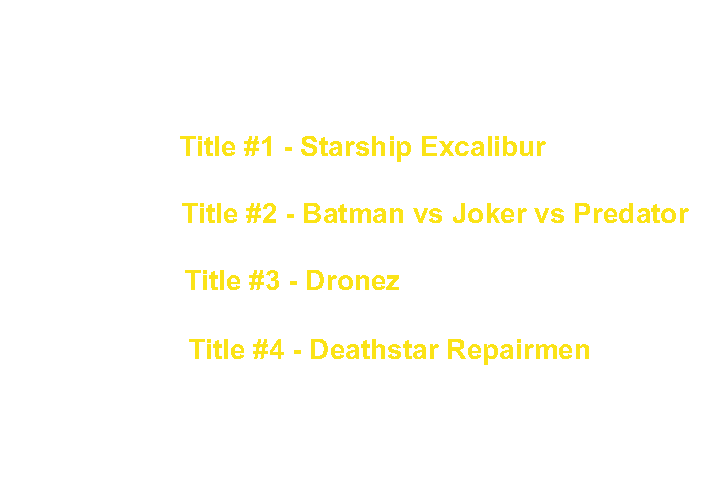
This is the selected image of the buttons.
This is the activated image of the buttons.
Ok, so we have an image representing each state of the buttons. So what do we do with these images? DVD video implements buttons using the subtitle channels built into DVD video mpeg stream, so we use the subtitle multiplexer program, like this:
bash$ spumux ../common/spumux.xml < menu_background.mpg > menu.mpg
The subtitle multiplexer program uses a subtitle definition file, in this case spumux.xml, to define the subtitle attributes. In this case, the spumux.xml file looks like this:
<subpictures>
 <stream>
   <spu
       force="yes"
       start="00:00:00.00"
       image="buttons.png"
       select="selected.png"
       highlight="highlight.png"
       autooutline="infer"
       autoorder="rows"
       outlinewidth="18">
   </spu>
 </stream>
</subpictures>
In this case I have decided to use the automatic features of spumux to detect rows of buttons. Read the man page for more information because honestly, I don't know that much about spumux. I used it as shown above and it worked, so let's move on.
Burning the DVD is the easiest part. According to the documentation it can be done in one step using growisofs, like this.
bash# growisofs -dvd-compat -Z /dev/dvd dvd/
In fact, I usually do it in two steps: first move the dvd filesystem into an iso file. Second burn the iso to a disk:
bash# mkisofs -dvd-video -o dvd.iso dvd/
bash# growisofs -dvd-compat -Z /dev/dvd=dvd.iso
As usual, in this tutorial we did it the hard way – we created our dvdauthor.xml file and menu graphics by hand. There exists a GUI front end that might make the whole process easier. The tool is called DVD Styler, you can learn more about it from this article http://www.bookpool.com/ct/177
Here's a great resource about DVD formats and especially the differences between NTSC and PAL: http://www.videohelp.com/dvd (local copy)
This is an excellent resource describing DVD format and functions: http://stream.uen.org/medsol/dvd/home.html
DVD Author has a manual at http://dvdauthor.sourceforge.net/doc/index.html
http://www.pioneer.co.jp/crdl/tech/dvd/1-e.html
Here's another great DVD Video walkthrough, with more details from the gentoo community:
http://forums.gentoo.org/viewtopic.php?t=117709
By Andrew Howlett, June 2005