This note explains how to mount linux partitions in Windows 11 and make them visible to Windows File Explorer.
Windows 11 (Win11) and Windows Subsystem for Linux version 2 (WSL2) have made it much easier to mount linux drives and partitions in Windows. Note that AFAIK this only works in Windows 11 and WSL2. If you have windows 10 you can subscribe to the Windows Insider Programme and upgrade to Windows 11. Of course I would make a backup image of my hard drive before doing that ...
The first step is to install Windows Subsystem for Linux and a Linux distribution. I use Ubuntu. Ubuntu 22.04 can be found in the Microsoft Store. Just search for Ubuntu in the Microsoft Store, select Ubuntu 22.04 LTS and install it. The download might take a long time depending on your internet connection. Follow the instructions. There is one point where it opens a terminal and you need to enter your ubuntu credentials.
By default WSL stores the linux disk image at C:\Users\[user]\AppData\Local\Packages\[distro]\LocalState\ext4.vhdx
For the [disto] look for something like “CanonicalGroupLimited.Ubuntu22.04LTS_79” with a random string appended to the end. Obviously it is formatted as ext4.
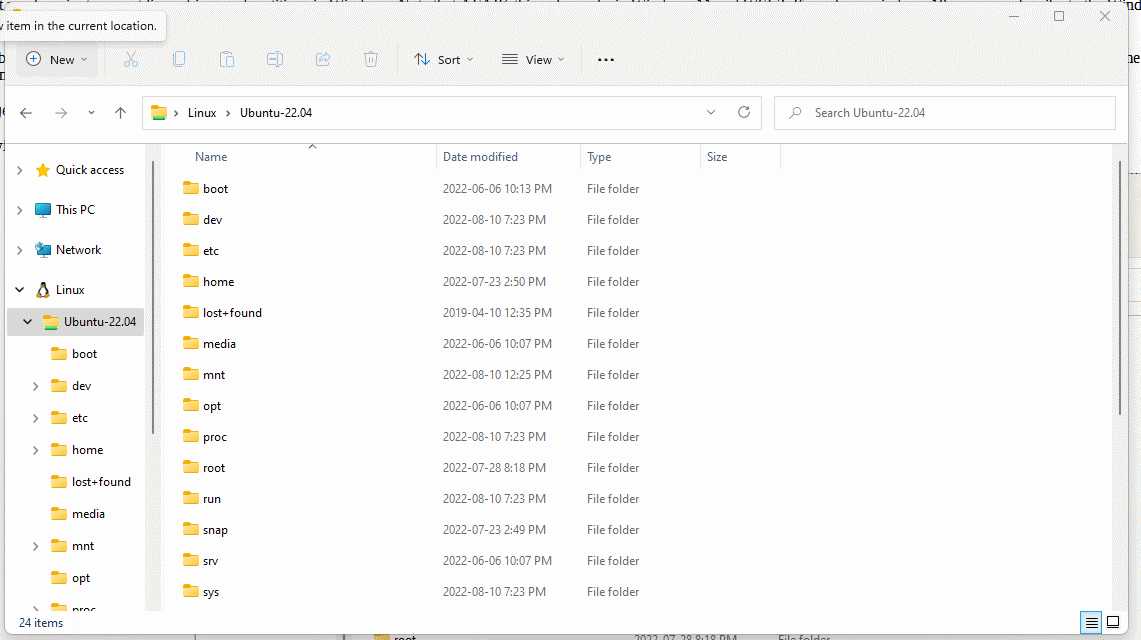
One of the really interesting things about Win11/WSL2 is that the Linux installation shows up in File Explorer. See image below. This implies that windows has a built in ext4 driver and that linux partitions can be mounted and viewed in Win11.
For this example I have a dual-boot machine with two storage devices. The 512GB storage device contains Win11. The 1TB storage device contains linux. I will just call it linux to differentiate it from the Ubuntu WSL2 installation.
Open a Powershell window with Administrator privileges and use the GET-CimInstance -query "SELECT * from Win32_DiskDrive" command to show the storage device names.
Windows PowerShell
Copyright (C) Microsoft Corporation. All rights reserved.

Install the latest PowerShell for new features and improvements! https://aka.ms/PSWindows

PS C:\Windows\system32> GET-CimInstance -query "SELECT * from Win32_DiskDrive"

DeviceID           Caption                      Partitions Size          Model
--------           -------                      ---------- ----          -----
\\.\PHYSICALDRIVE1 Samsung SSD 970 EVO Plus 1TB 3          1000202273280 Samsung SSD 970 EVO Plus 1TB
\\.\PHYSICALDRIVE0 SKHynix_HFS512GDE9X084N      3          512105932800  SKHynix_HFS512GDE9X084N
From the output we can see that \\.\PHYSICALDRIVE1 is the 1TB device. Again, using the Powershell window, mount the storage device in WSL2 as a bare device
PS C:\Windows\system32> wsl --mount \\.\PHYSICALDRIVE1 --bare
Open a WSL2 Ubuntu window use the sudo -i command to change to root and use the dmesg command. You should see this near the end of the dmesg output:
[  235.114084] sd 0:0:0:2: [sdc] Synchronizing SCSI cache
[  235.114233] sd 0:0:0:2: [sdc] Synchronize Cache(10) failed: Result: hostbyte=0x01 driverbyte=0x00
[  268.274814] scsi 0:0:0:2: Direct-Access     NVMe     Samsung SSD 970  EXM7 PQ: 0 ANSI: 6
[  268.275229] sd 0:0:0:2: Attached scsi generic sg2 type 0
[  268.275685] sd 0:0:0:2: [sdc] 1953525168 512-byte logical blocks: (1.00 TB/932 GiB)
[  268.275687] sd 0:0:0:2: [sdc] 4096-byte physical blocks
[  268.277404] sd 0:0:0:2: [sdc] Write Protect is off
[  268.277406] sd 0:0:0:2: [sdc] Mode Sense: 0f 00 10 00
[  268.280720] sd 0:0:0:2: [sdc] Write cache: enabled, read cache: enabled, supports DPO and FUA
[  268.282813]  sdc: sdc1 sdc2 sdc3
[  268.286746] sd 0:0:0:2: [sdc] Attached SCSI disk
We can see that the Samsung SSD 970 is now available within linux as /dev/sdc and it’s partitions can be mounted using the normal mount command:
mkdir /mnt/linux
mount /dev/sdc3 /mnt/linux
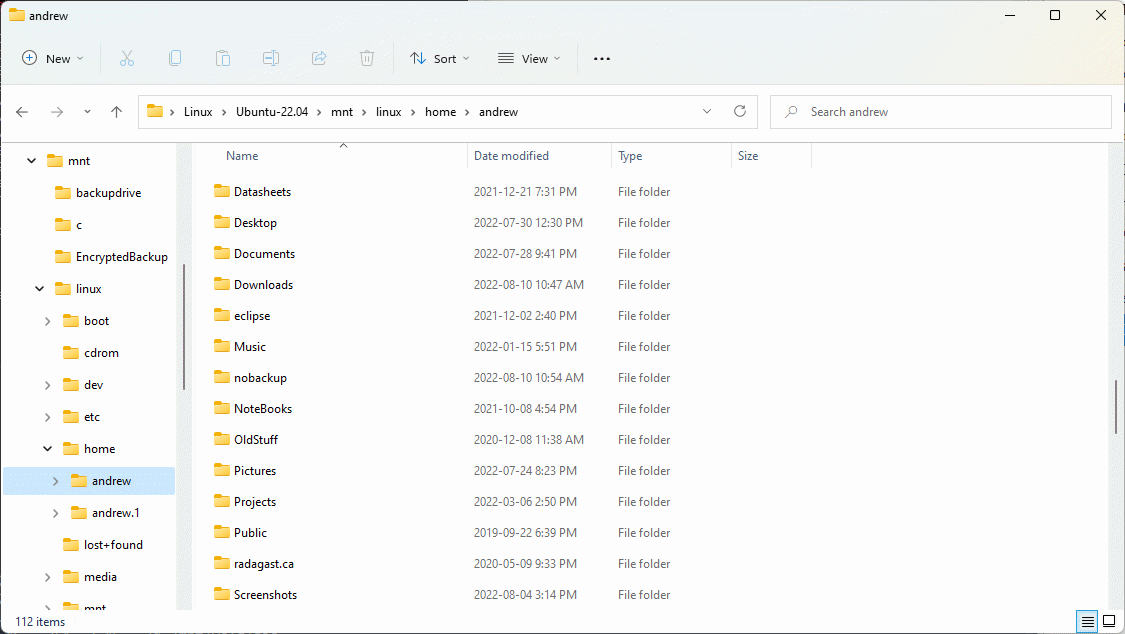
If we browse to that folder using File Explorer in the win11 GUI then we can see the files from windows.
Building on the previous section, it is easy to mount LUKS encrypted drives and partitions. In this example a Western Digital 2TB hard drive has been encrypted with LUKS. It is connected to the windows machine using a USB dock.
Connect the drive to the windows box and make sure it is turned on. Then in the Powershell window use the same command as before to see the device names.
PS C:\Windows\system32> GET-CimInstance -query "SELECT * from Win32_DiskDrive"

DeviceID           Caption                                Partitions Size          Model
--------           -------                                ---------- ----          -----
\\.\PHYSICALDRIVE1 Samsung SSD 970 EVO Plus 1TB           3          1000202273280 Samsung SSD 970 EVO Plus 1TB
\\.\PHYSICALDRIVE2 WDC WD20 EZBX-00AYRA0 SCSI Disk Device 0          2000396321280 WDC WD20 EZBX-00AYRA0 SCSI Disk D...
\\.\PHYSICALDRIVE0 SKHynix_HFS512GDE9X084N                3          512105932800  SKHynix_HFS512GDE9X084N
The WDC drive is \\.\PHYSICALDRIVE2. So we mount it in WSL2 as a bare device
PS C:\Windows\system32> wsl --mount \\.\PHYSICALDRIVE2 --bare
in the Ubuntu WSL2 window we can use dmesg to check if linux sees the new device:
[  572.430150] scsi 0:0:0:4: Direct-Access     WDC WD20 EZBX-00AYRA0     01.0 PQ: 0 ANSI: 6
[  572.432063] sd 0:0:0:4: Attached scsi generic sg4 type 0
[  572.433412] sd 0:0:0:4: [sde] 3907029168 512-byte logical blocks: (2.00 TB/1.82 TiB)
[  572.433413] sd 0:0:0:4: [sde] 4096-byte physical blocks
[  572.434122] sd 0:0:0:4: [sde] Write Protect is off
[  572.434124] sd 0:0:0:4: [sde] Mode Sense: 0f 00 00 00
[  572.435468] sd 0:0:0:4: [sde] Write cache: enabled, read cache: enabled, doesn't support DPO or FUA
[  572.435470] sd 0:0:0:4: [sde] Optimal transfer size 33553920 bytes not a multiple of physical block size (4096 bytes)
[  572.439696] sd 0:0:0:4: [sde] Attached SCSI disk
The new device is present as /dev/sde so we can mount it using the normal cryptsetup commands:
root@LAPTOP-J1HDSUDO# cryptsetup --key-file keyfile.txt luksOpen /dev/sde EncryptedBackup root@LAPTOP-J1HDSUDO# ls /dev/mapper/ control EncryptedBackup root@LAPTOP-J1HDSUDO# mkdir /mnt/EncryptedBackup root@LAPTOP-J1HDSUDO# mount /dev/mapper/EncryptedBackup /mnt/EncryptedBackup root@LAPTOP-J1HDSUDO# df -h Filesystem Size Used Avail Use% Mounted on /dev/sdd 251G 2.6G 236G 2% / none 3.4G 32K 3.4G 1% /mnt/wslg none 3.4G 4.0K 3.4G 1% /mnt/wsl tools 475G 128G 348G 27% /init none 3.4G 8.0K 3.4G 1% /run none 3.4G 0 3.4G 0% /run/lock none 3.4G 0 3.4G 0% /run/shm none 3.4G 0 3.4G 0% /run/user tmpfs 3.4G 0 3.4G 0% /sys/fs/cgroup drivers 475G 128G 348G 27% /usr/lib/wsl/drivers lib 475G 128G 348G 27% /usr/lib/wsl/lib none 3.4G 76K 3.4G 1% /mnt/wslg/versions.txt none 3.4G 76K 3.4G 1% /mnt/wslg/doc drvfs 475G 128G 348G 27% /mnt/c /dev/sdc3 886G 750G 92G 90% /mnt/linux /dev/mapper/EncryptedBackup 1.8T 327G 1.4T 19% /mnt/EncryptedBackupMission accomplished!